Whitewitch Recap


posted by Chet @ 11:11 AM
1 comments
![]()

posted by Chet @ 5:34 PM
0 comments
![]()
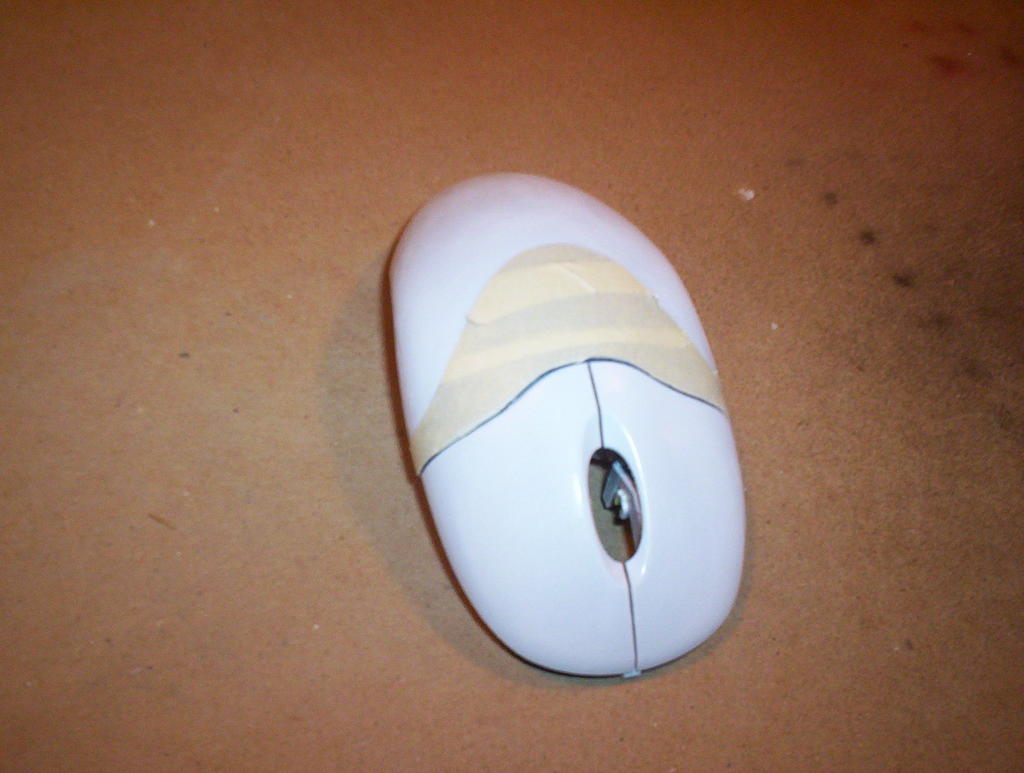
 And it's done! More or less. Still working on the mouse. It's about as fun as watching paint dry, since that's what I'm doing. But the look is pretty damn intense. It looks even better in real life.
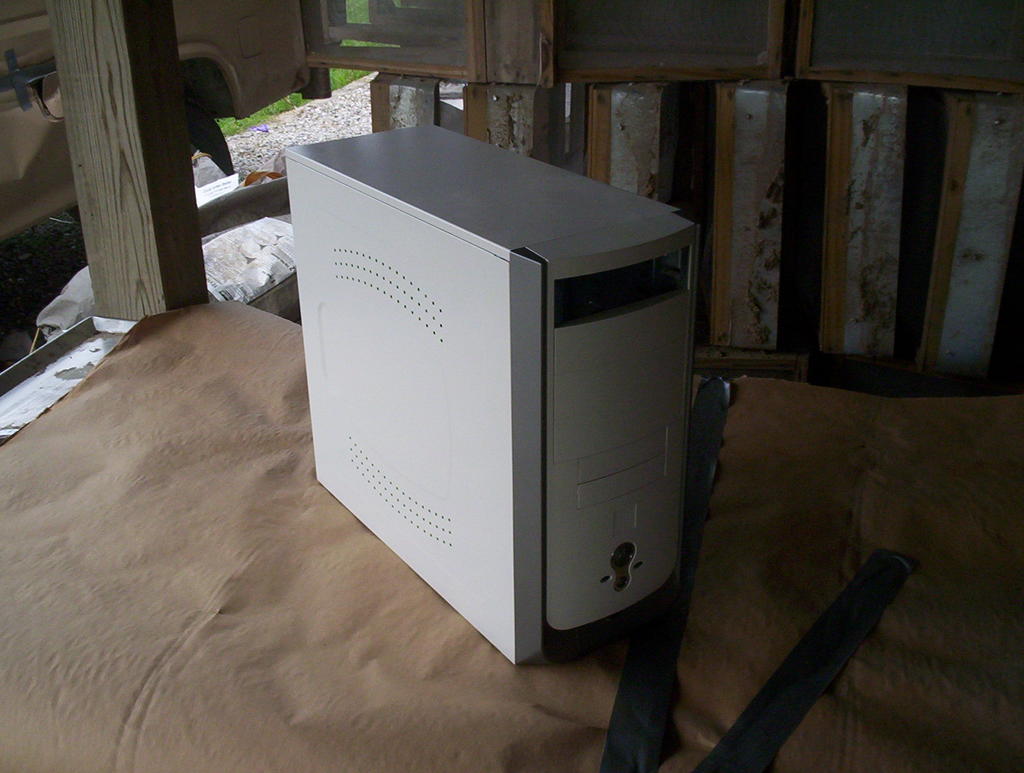
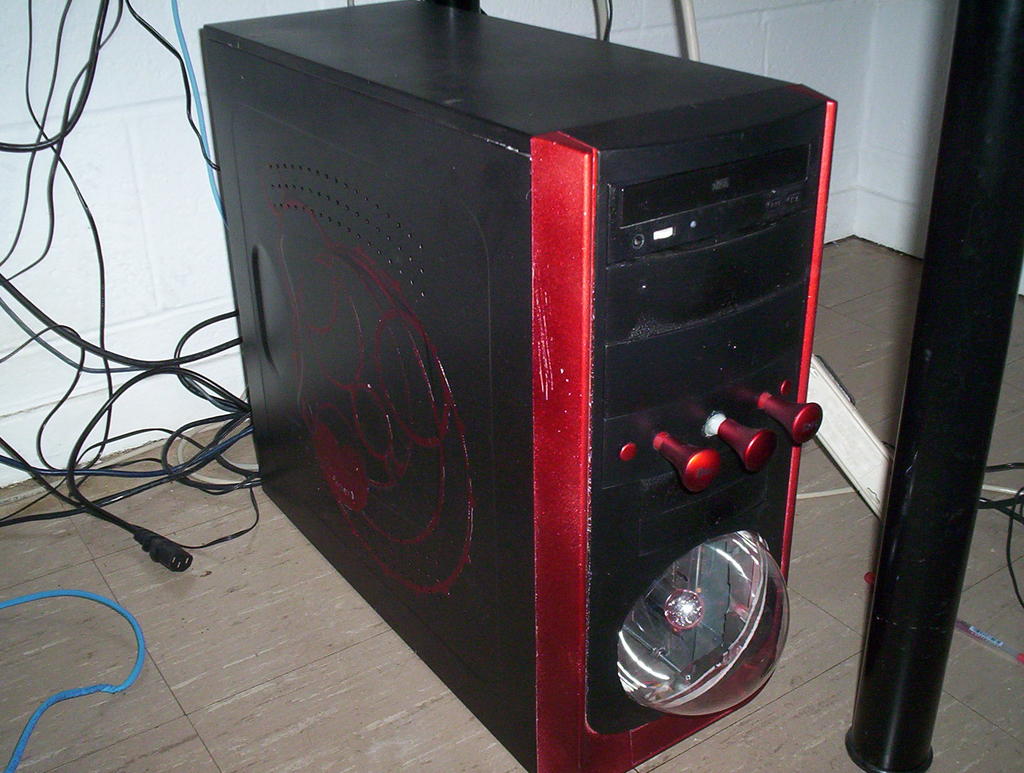 Old case for comparison:
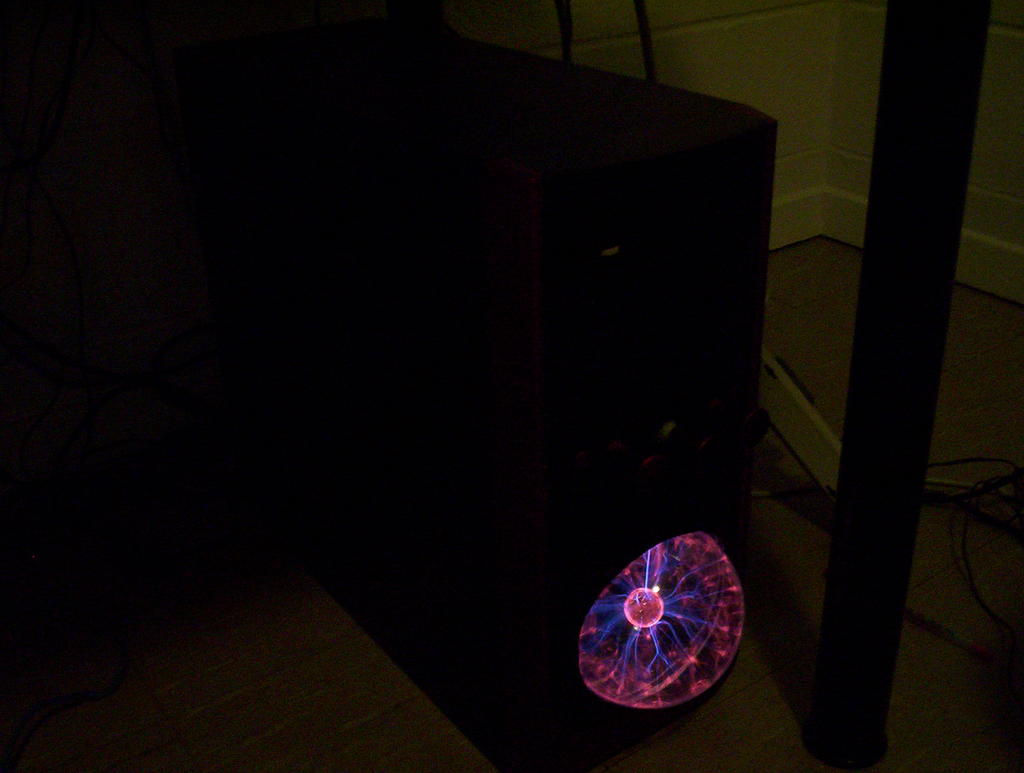 You can touch the globe, of course, and it does everything you'd expect. It's so cool.
 Coming soon in an epilogue - the mouse mod. Stay tuned!
posted by Chet @ 7:21 PM
6 comments
![]()
 Rub-on letters in an "Old English" style label the power and reset buttons:
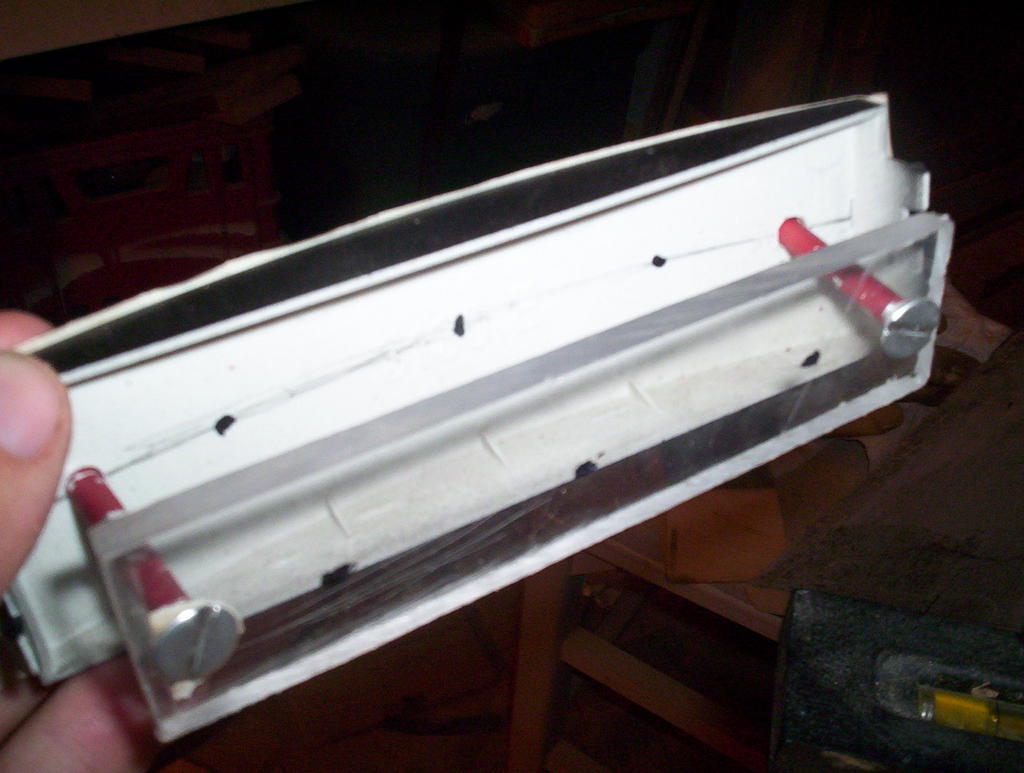
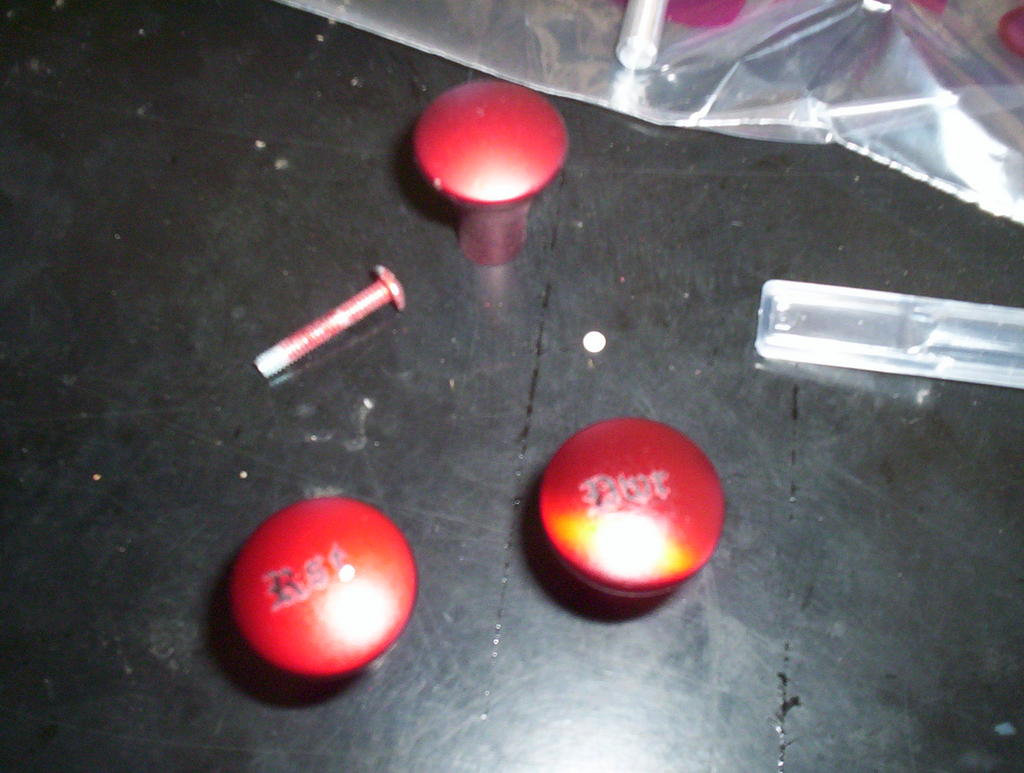 And the switch panel is completed; the center bolt is simply hot-glued to the button. Power and reset leads are soldered to their switches.
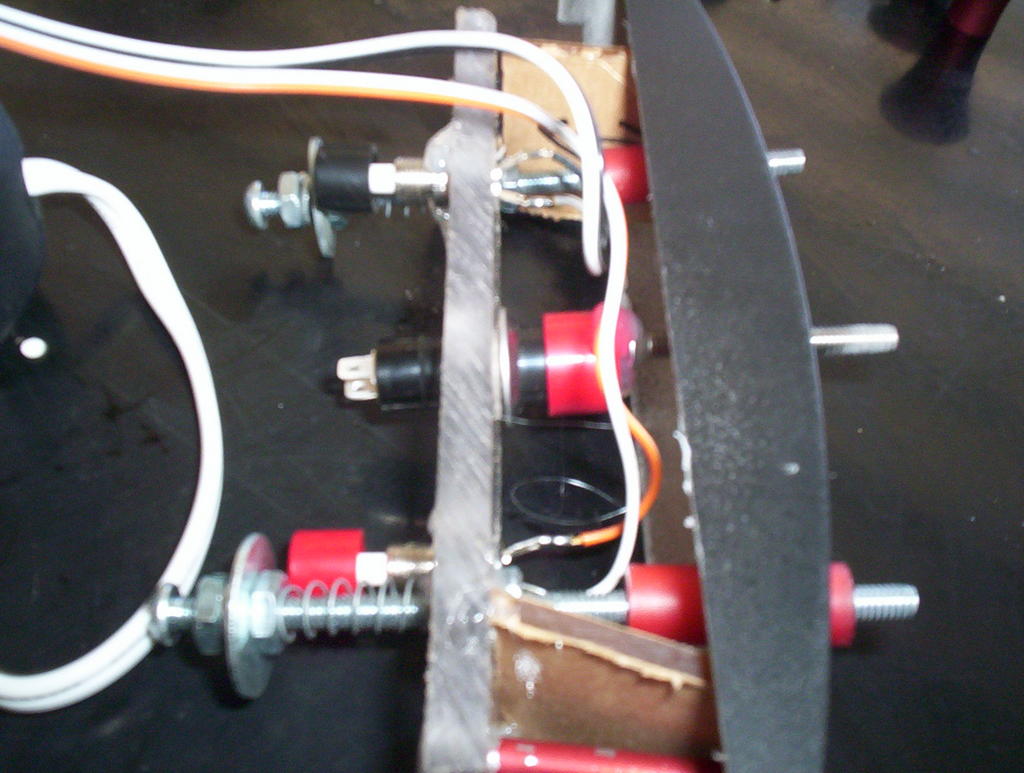
 Marked out in chalk:
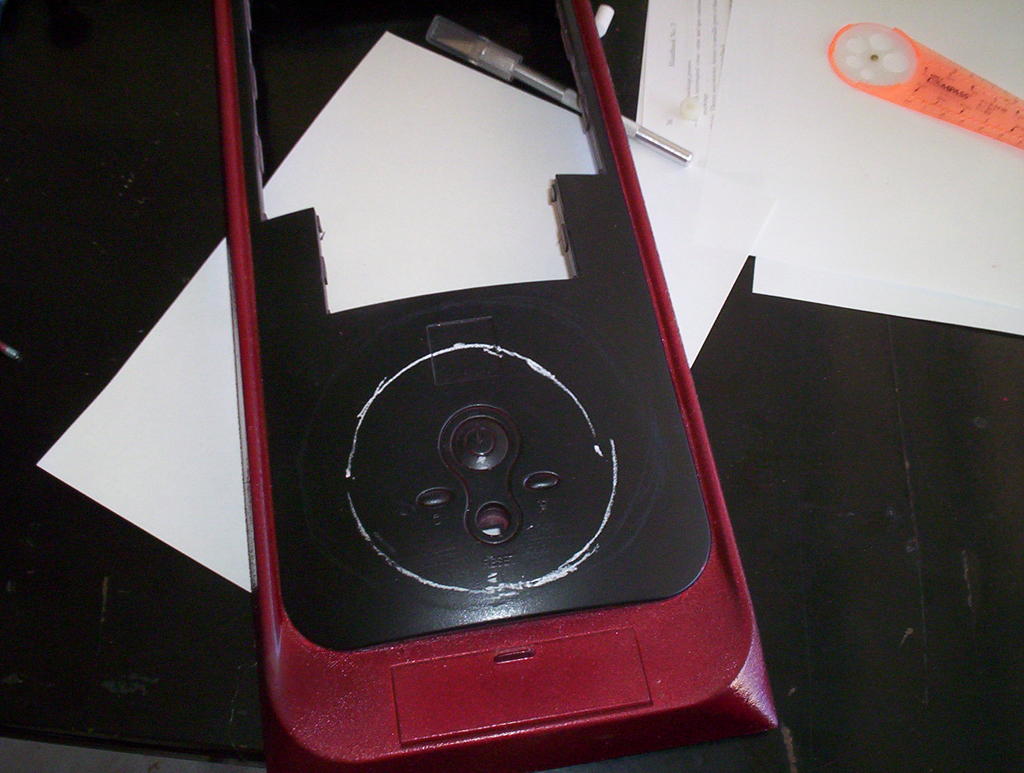
 And finally, gradually opened to the proper diameter and profile with the coarse grinding stone, again on the Dremel. This part took about an hour and a half - grind a little, test fit, grind a little more. Luckily plastic is pliant.
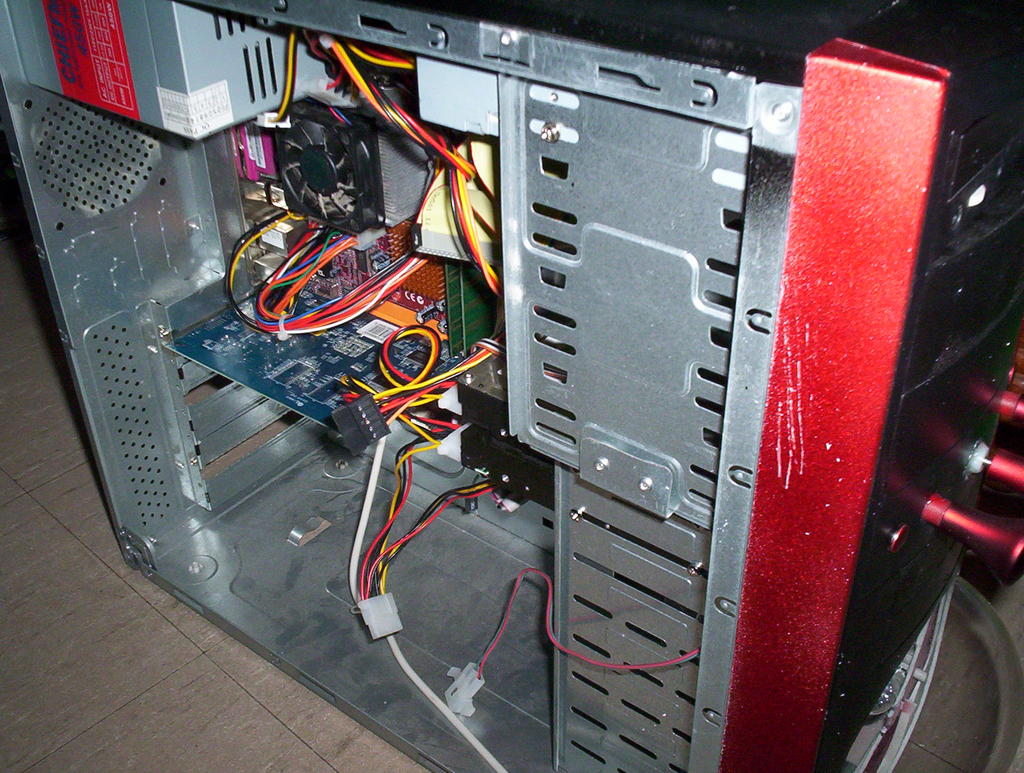
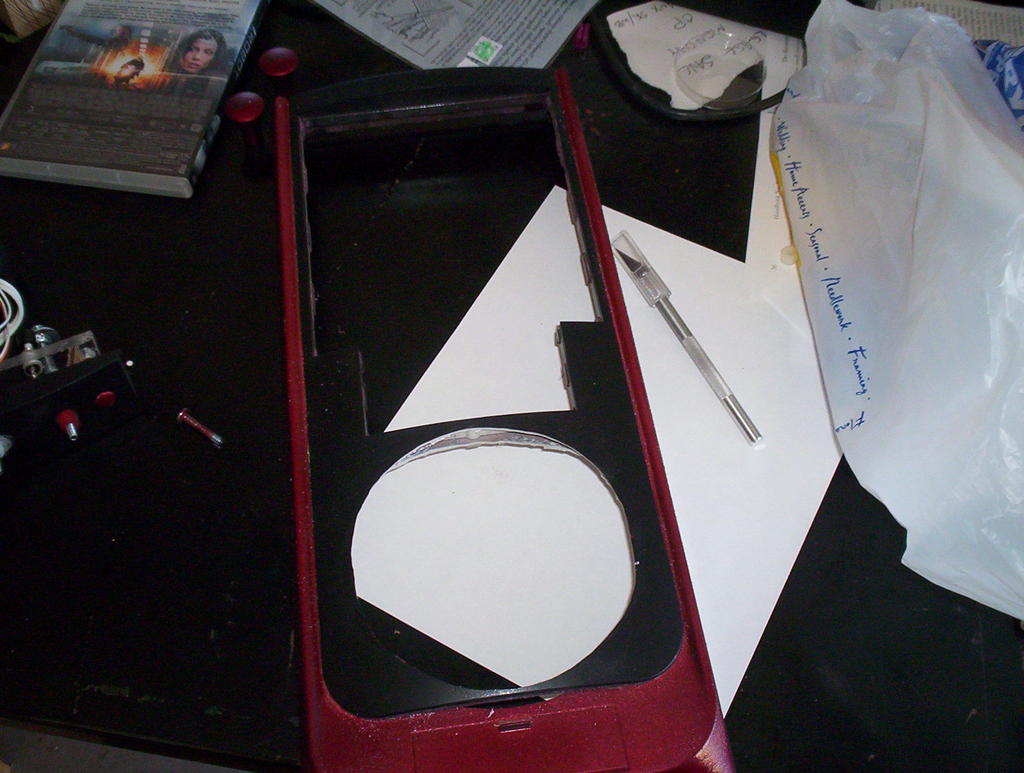 I performed a test fit, just to see how all the parts look, but I don't want to spoil the final effect so no pictures of that. Next up - wiring the inverter. Luckily for me, the globe's inverter can take the 12VDC right off of my computer's power supply; a salvaged Molex passthrough provides the connection, once it's soldered and heatshrinked:
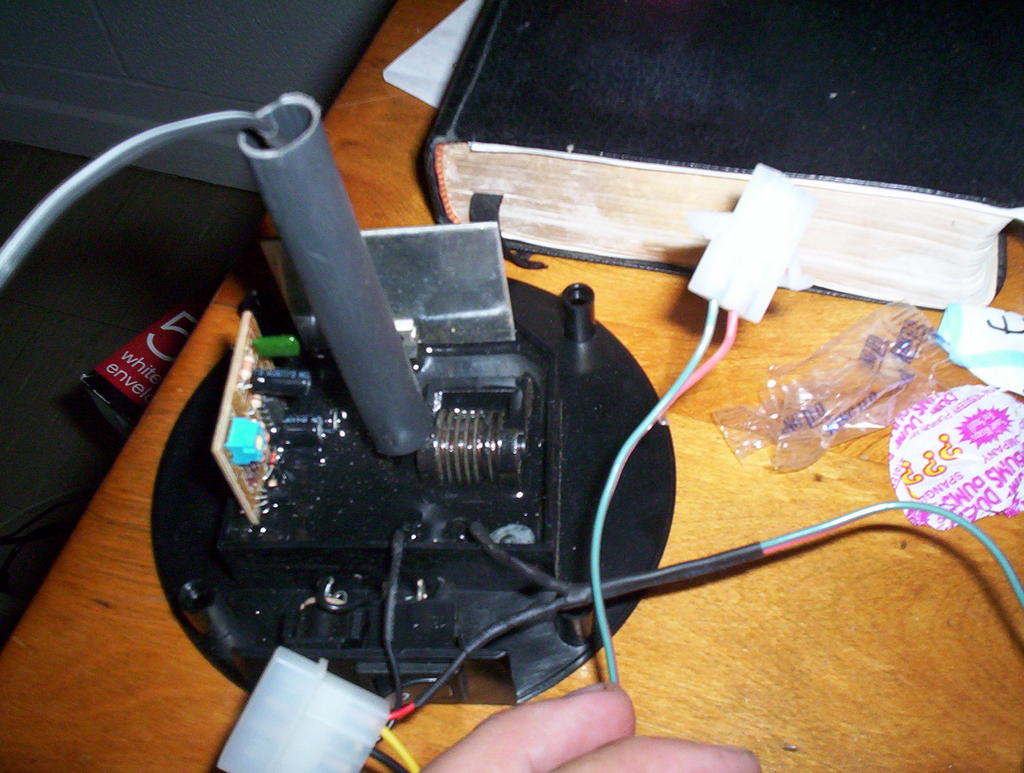 There's a little more to it, of course - the extra cord (in my hand) running off to a two-pin Molex provides the connection to the switch up on the panel. The wire coming up out of the top provides current to the globe. At last, it's ready to be incorporated into the case. I'm just about done.
posted by Chet @ 6:58 PM
0 comments
![]()
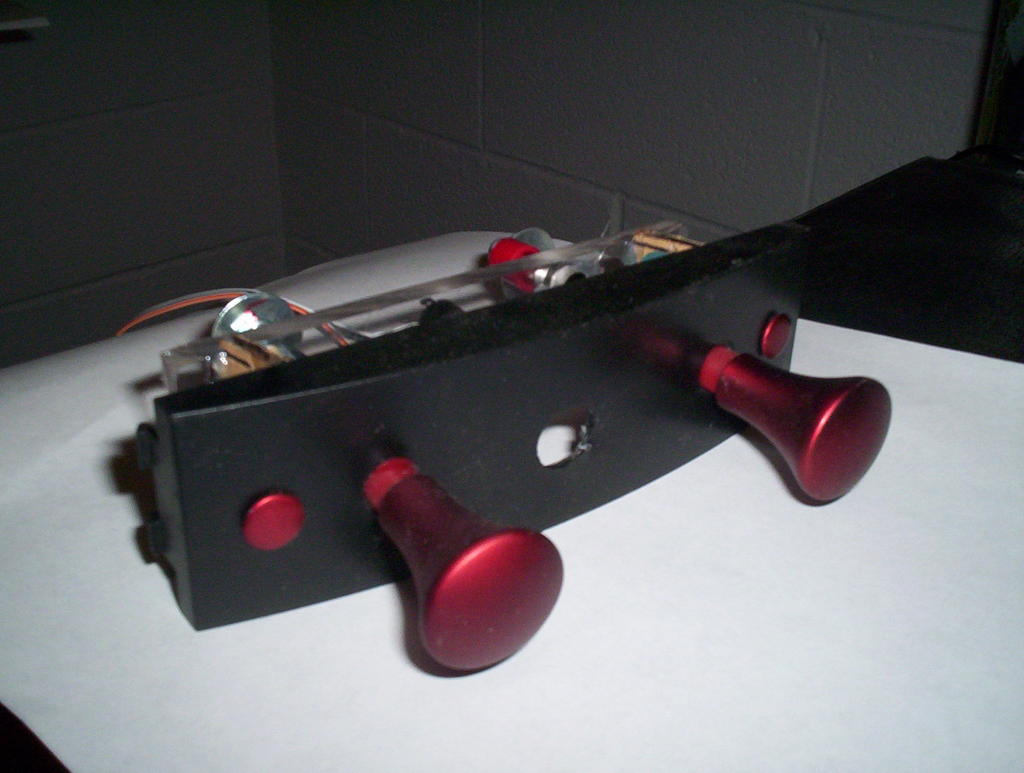 The luster (lustre?) on the knobs looks really great. But it's a lot less red than how I've painted the case. I'm thinking now of using the same spray (over the metallic grey base recommended by Krylon). I really like the look of that a lot better than the fire-engine red. I think that's going to be a much better look. Here's another shot of the assembly, from higher up:
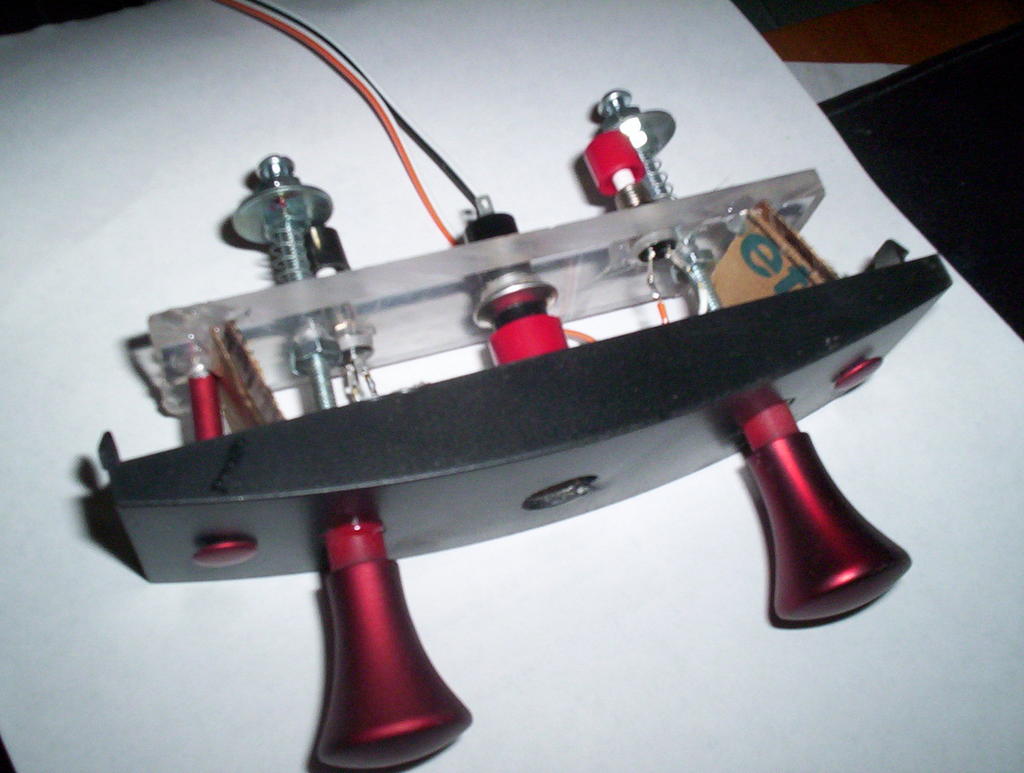 You can see how the washers on the bolts press down on the switches when they are pulled, and how they're returned by springs. The rear panel is supported firmly by a pair of thin plexiglass braces.
posted by Chet @ 5:42 PM
1 comments
![]()
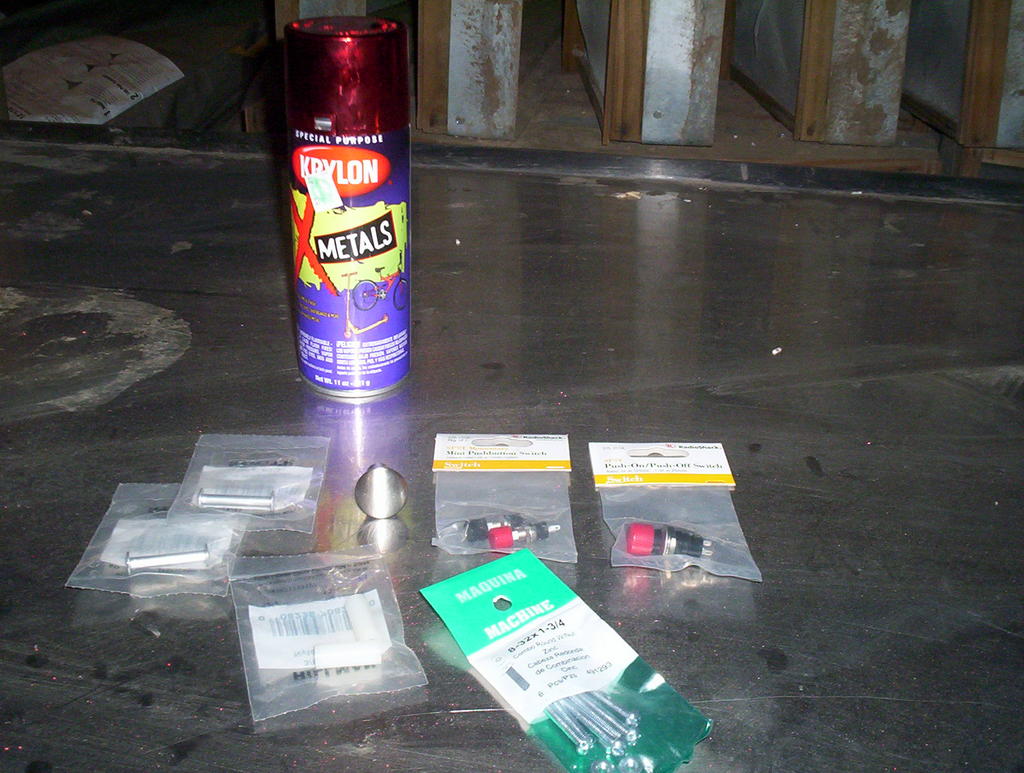 Quick trips to Lowe's and Radio Shack for the parts. I picked up two momentary pushbutton switches for power and reset. Also, I was thinking about how I tend to leave my computer on for weeks at a time, and how I don't think I want the globe or other lighting effects running all the damn time. The little transformer in the globe is actually a little hummy.
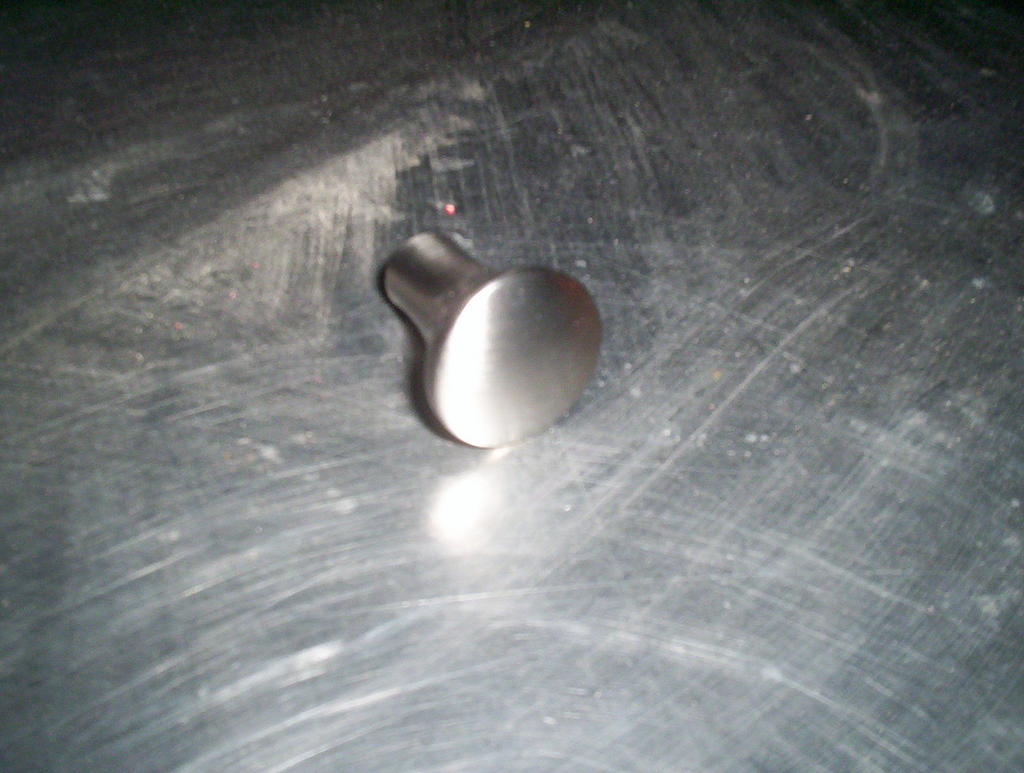 In order to get a good, even coat on an item that is very small and heavy in the wrong direction, I decided to suspend them from bolts and strings. This had the advantage of me not having to mask out the work area to keep from getting paint everywhere. Here they are, hanging from kite string and ready to paint:
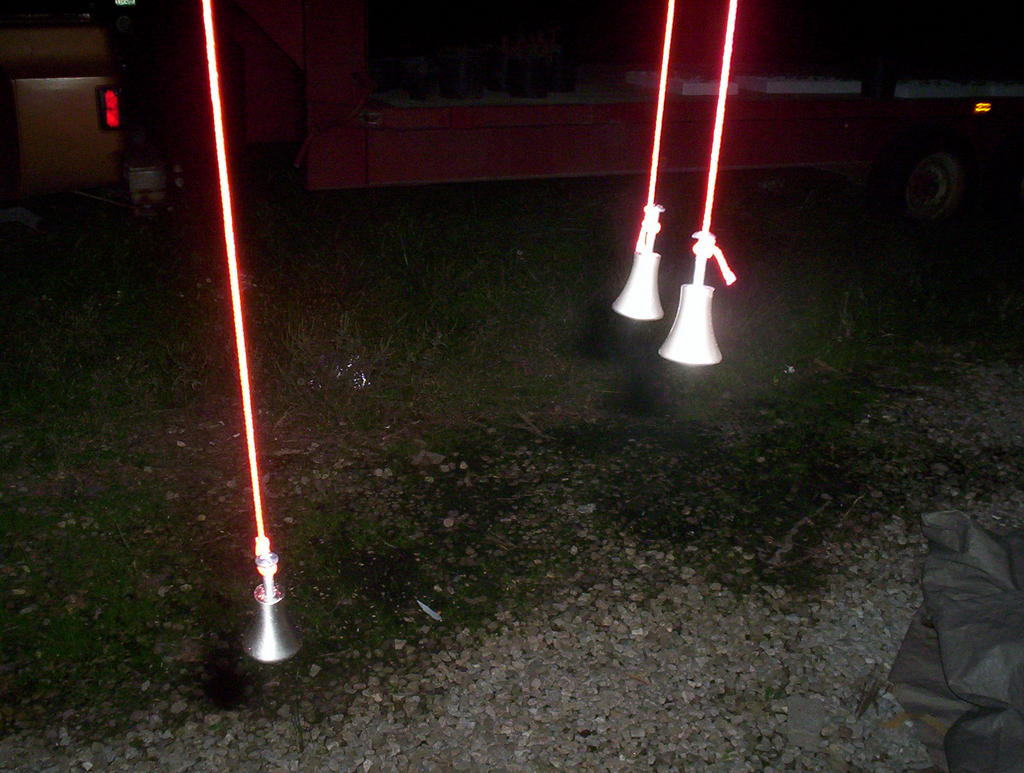 And here they are with a good coat of neat-looking paint. They should look pretty good sticking out of the front of my computer.
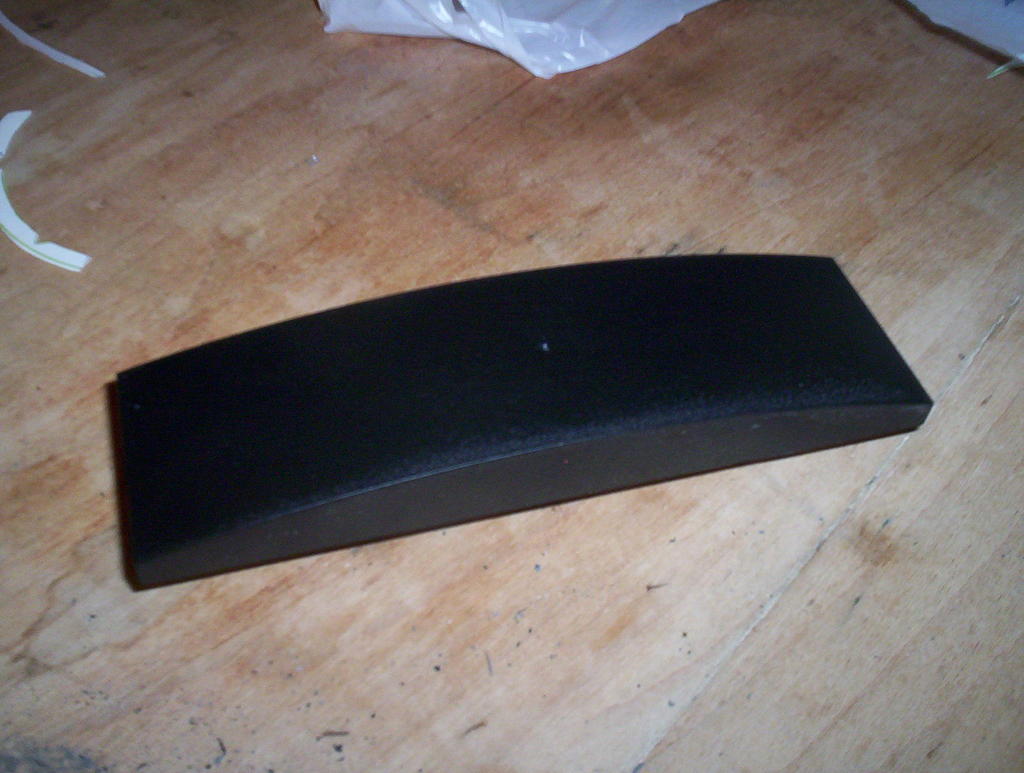
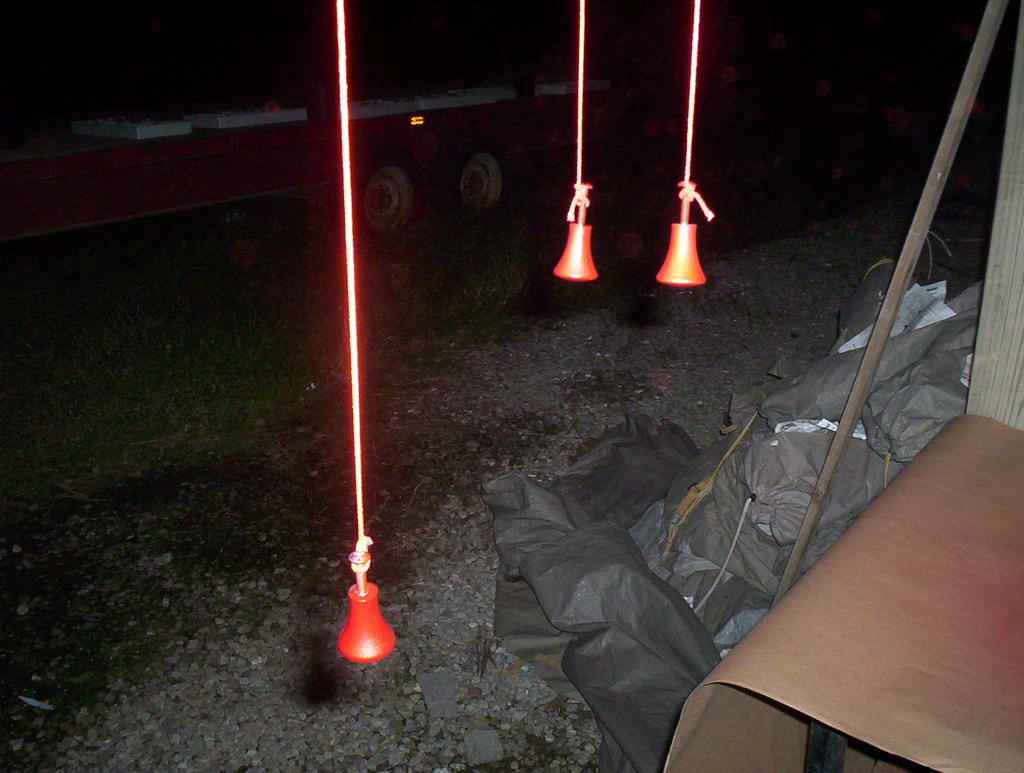 Here's five holes laid out in the case panel - three for the knobs and two, one on each end, for the aluminum (also painted) standoffs that will hold a panel for the switches to mount to.
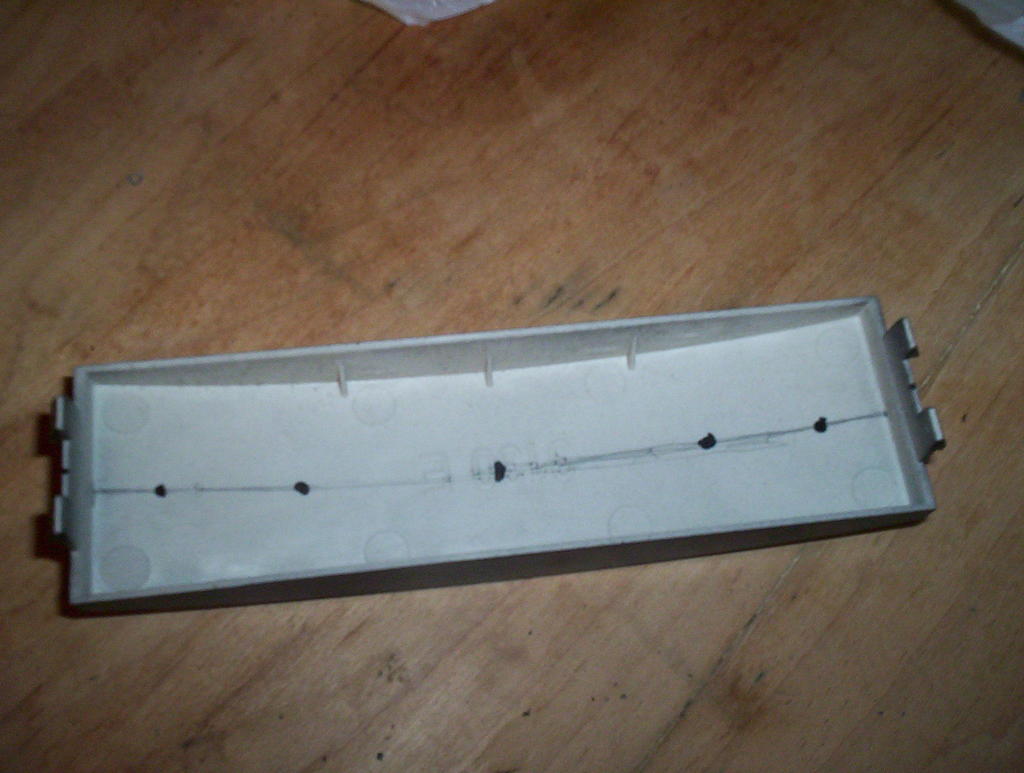
 Plexiglass switch panel with holes drilled and switches test-fitted.
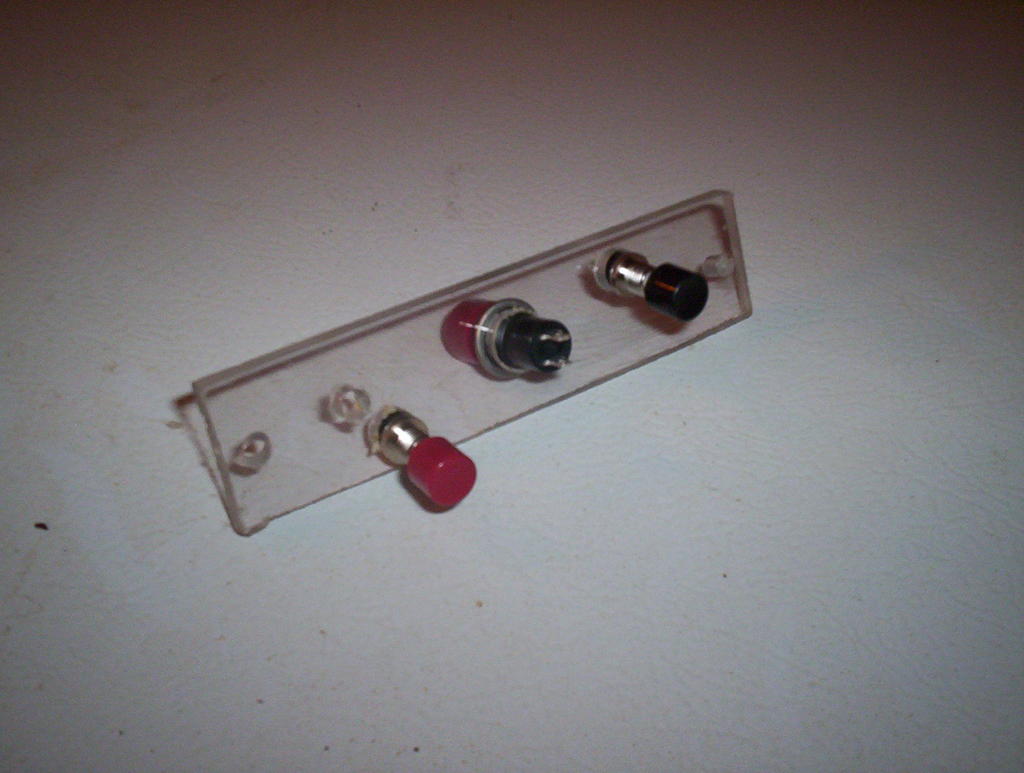 Now, if you're looking closely here, you may be noticing that one switch faces frontwards (this is actually a picture of the back of the panel) while two face backwards. The reason for this is asthetic. The center knob will push in to toggle case effects, but the two on either end - power and reset - will be actuated with a pulling motion, to really get that "organ stop" feel.
posted by Chet @ 6:51 PM
0 comments
![]()
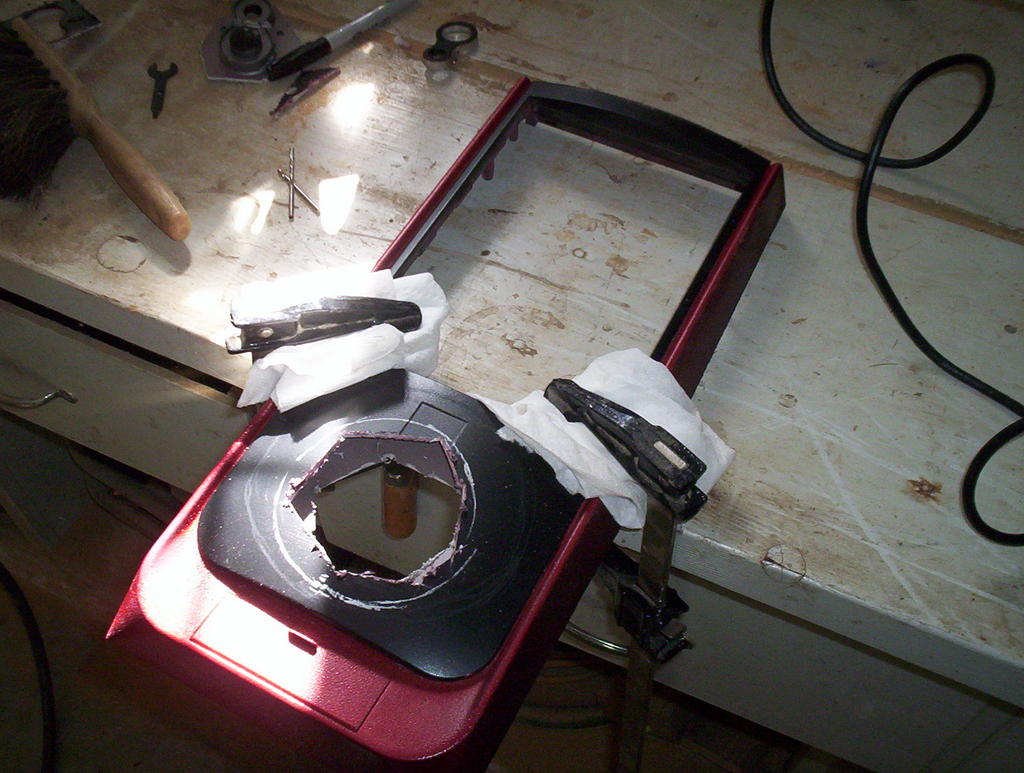
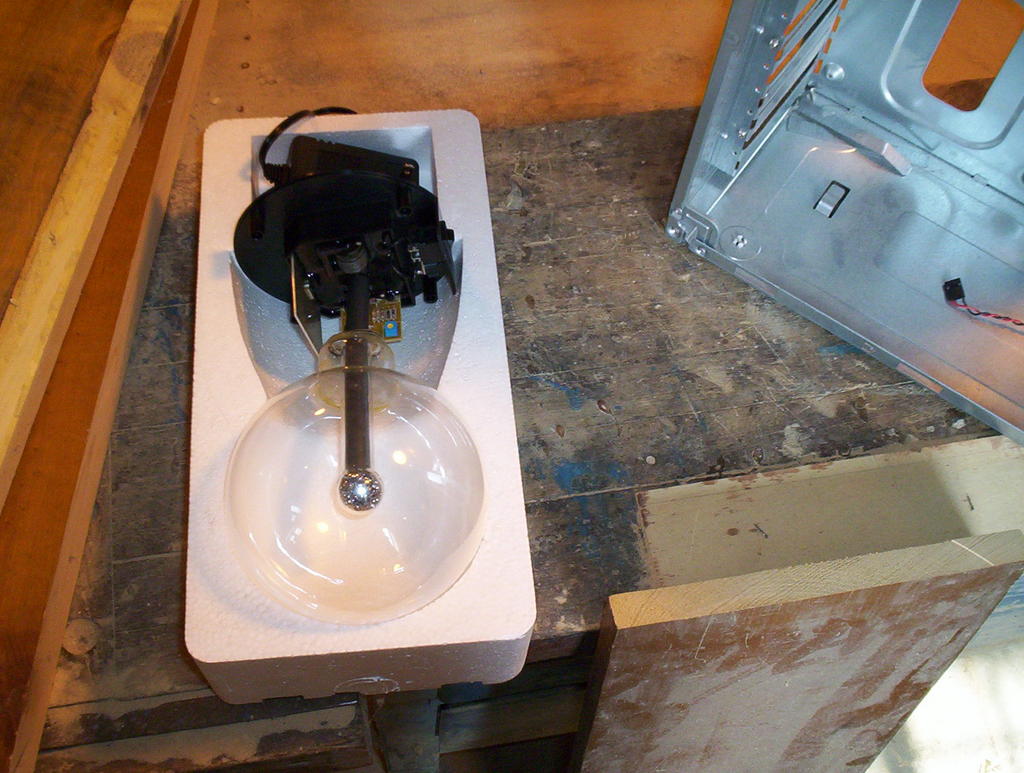 A plasma globe works by bullshit bullshit high voltage AC field bullshit bullshit through low pressure gas in a glass sphere bullshit bullshit bullshit. Therefore I need to make sure that all that current isn't grounding through my case; not only would that be bad (I presume) for the stuff in my computer, but all the cool blue filaments wouldn't go anywhere but to the parts of the globe that were in contact with the case. (Pretty quickly the glass would get hot enough to melt, in contact with a conductor like that.) Therefore I fabricated a plexiglass mounting plate to hold the globe in place:
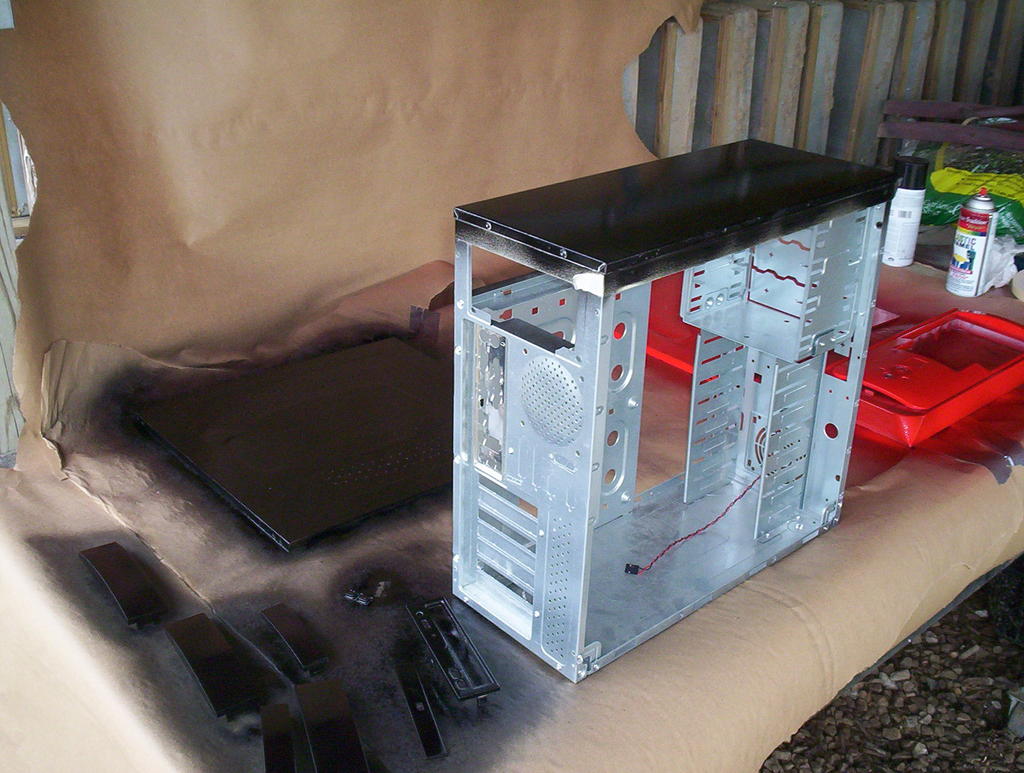
 The plate is held in place by four long bolts. I used tin snips to cut a big enough hole out of the front of the case. If the plexiglass plate looks different below, that's because its a different plate. I had to cut that thing about three times. "Measure none, cut thrice." That's my motto.
 The glass globe sits snugly in the socket in the plate, not touching any of the metal case. Just to be sure I'm going to line the case's hole with an insulating gasket just to prevent any chance of conduction through the case.
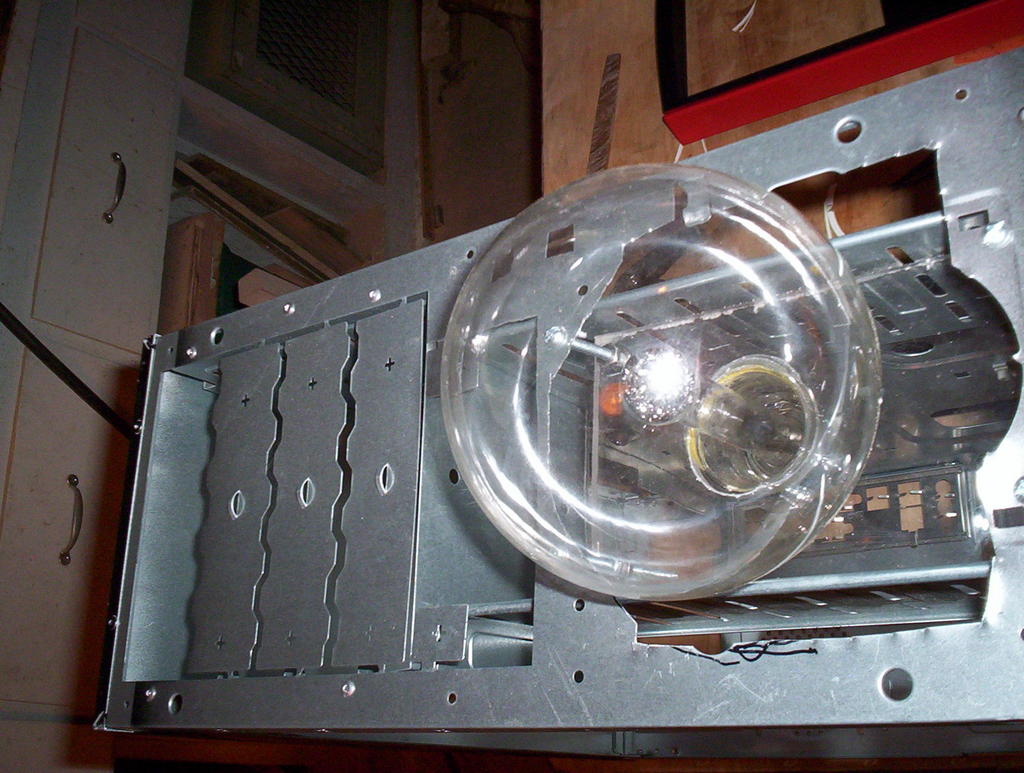 And, below, I've tried to mark out on the bezel where I'm going to have to cut the hole out.
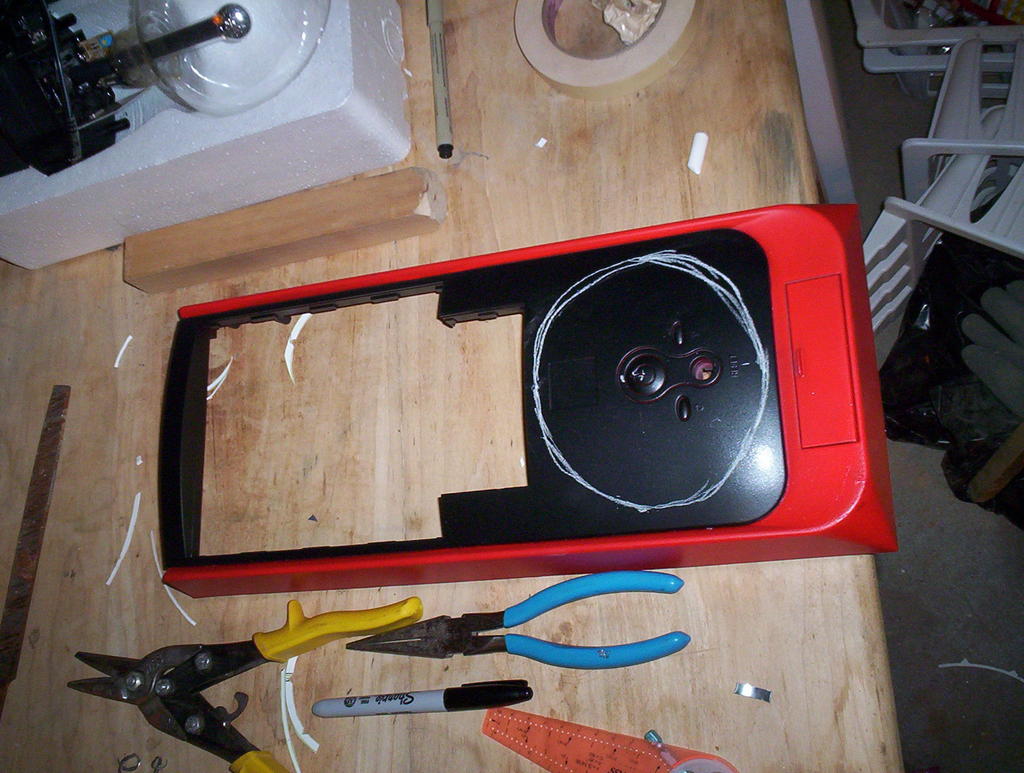 That's the real tricky part. This is the hole that has to look nice and fit snugly; the globe will, to some extent, be resting on the plastic bezel for support. The globe is almost too big. It's gonna be impressive as hell, assuming I don't crash my chairleg into it one day, and a surefire hit at the next time I'm at a lan party, which will be never, I'm sure.
posted by Chet @ 6:03 PM
0 comments
![]()
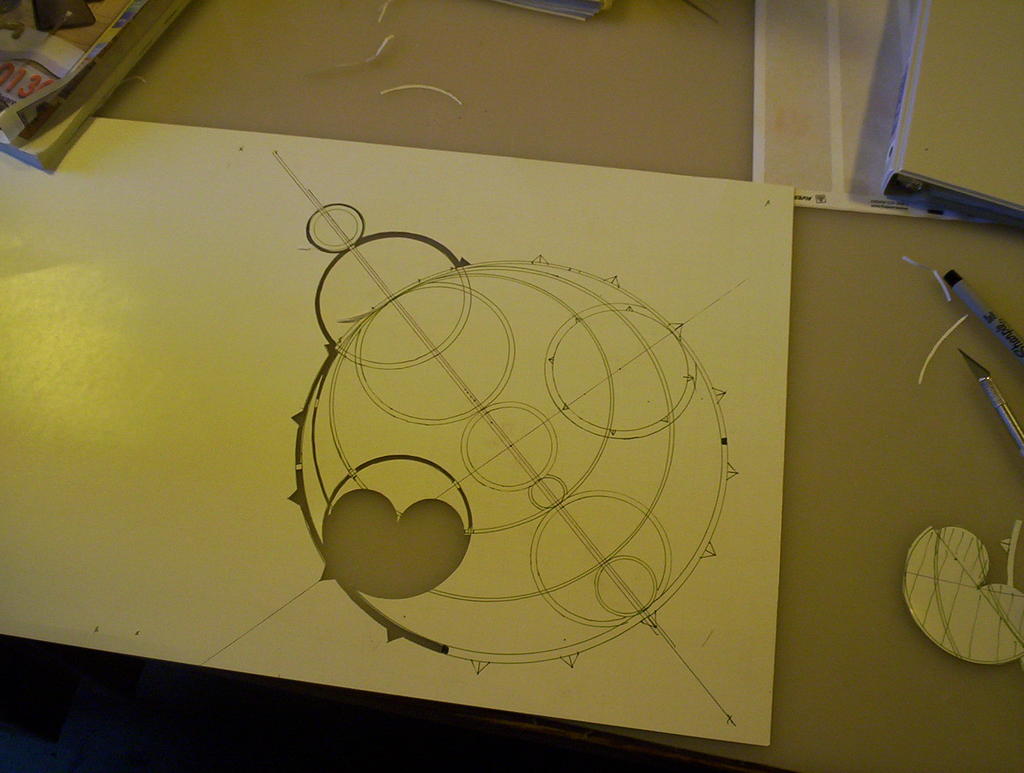 Above we see the diagram laid out on posterboard, and I'm beginning to trim it out as a stencil using an x-acto knife.
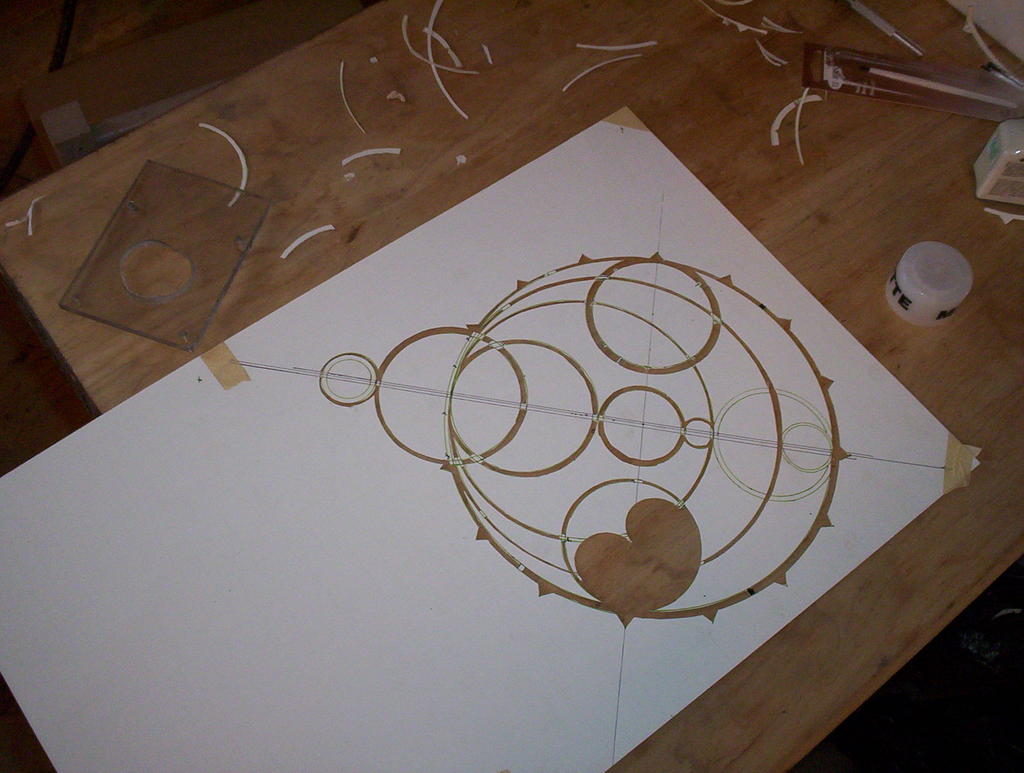
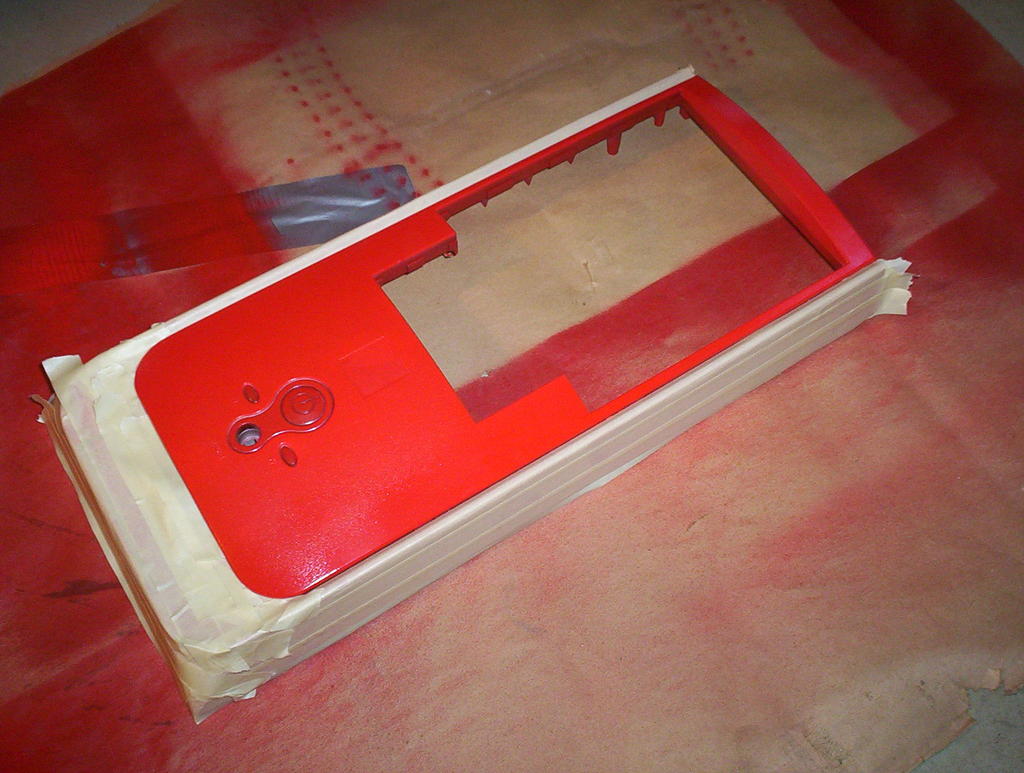
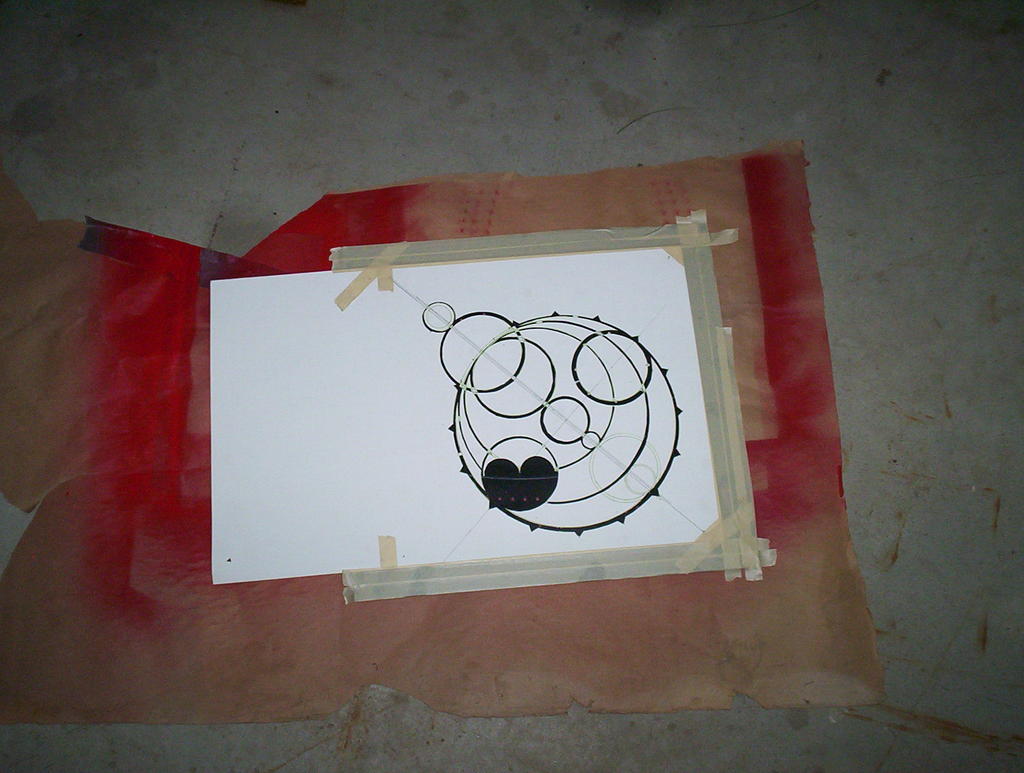 Ready to paint. I've taped the stencil on, masked out the edges, and we're ready to go. Since the bezel is ready to be painted too, lets go ahead and do that too.
 The finished panel. Looks pretty good to me. Had a little paint peel at the corners, so I went ahead and touched those up, too. It doesn't look too bad in this picture but it's not exactly pro-level work. Not bad for a rattlecan, though.
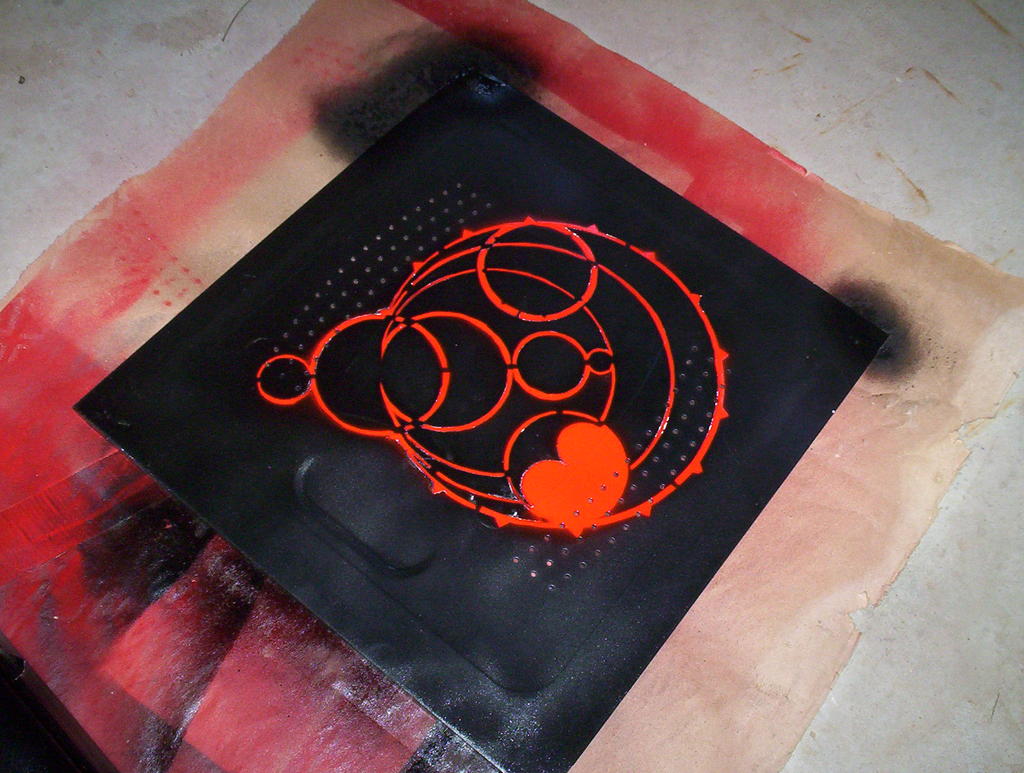 And a brief mockup with all the painted parts. The color is a little off in the picture; it's really fire-engine red, not day-glo orange. Poor lighting in the shop. Still, looking pretty good.
posted by Chet @ 5:50 PM
0 comments
![]()

posted by Chet @ 5:27 PM
0 comments
![]()

posted by Chet @ 11:14 PM
1 comments
![]()